
From policies to source behavior and chatbot configurations, everything’s organized for easy updates and fine-tuning to fit your dealership’s needs.
Note: These Policies are the new way of prompting your AI Sales Assistant. They work the same way as before; they just appear and need to be added slightly differently.
Step 1: Review AI Sales Assistant Policies
Access Policies to set business rules, tone, voice, and system configuration.
Policies shape how your AI Sales Assistant interacts, making sure it aligns with your goals and store rules.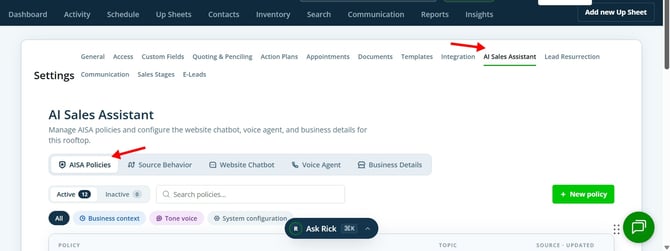
Business Context covers what the assistant knows—your store details, business goals, unique rules, and anything that sets your dealership apart.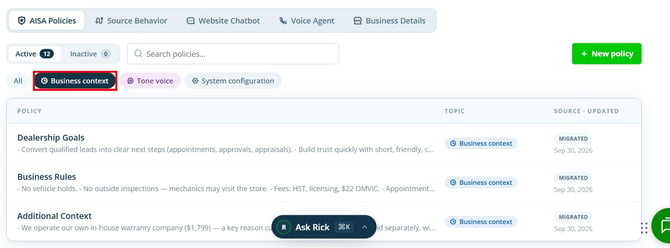
Step 2: Create and Review Policy Statements
Add policy statements as prompts for the AI. Hit Review to have the system analyze your statements and identify any issues. Once everything looks good, and the AI confirms your policies are strong and no changes are required, you can then save your Policy.-jpg.jpeg?width=670&height=323&name=Screenshot%202026-10-01%20173239%20(1)-jpg.jpeg)
Step 3: Adjust Tone, Voice, and Behavior
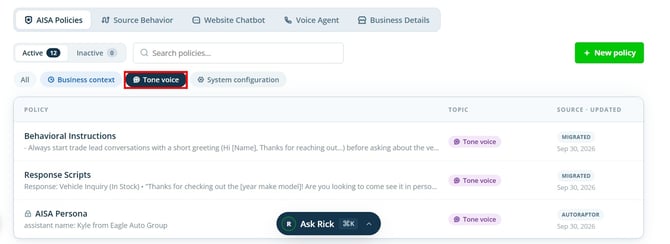
Use Tone and Voice controls to customize how your AI sounds, selects a persona, follows scripts, and behaves.
Make use of the AI’s built-in tool to review your prompts and policies before adding them.
Step 4: Configure System Options
Fine-tune special system behaviors like Opt Out Phrases, Current Promotions, and Notes History (how far back the assistant should look at previous notes)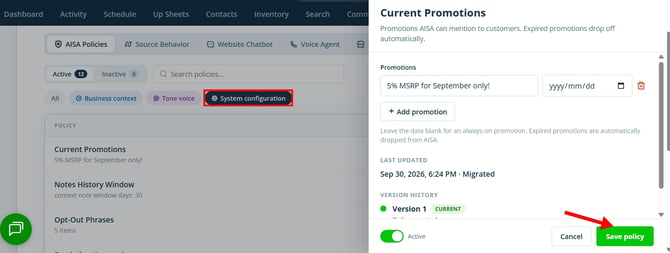
Manage escalation words, rep activity cooldowns (the wait time after a sales rep contacts a lead), and keyword triggers for temperature detection.
Step 5: Add or Archive Policies
To create a new policy, click New Policy, select a category, add a title, provide your statement and description, then review andsave your Policy by clicking on Create Policy.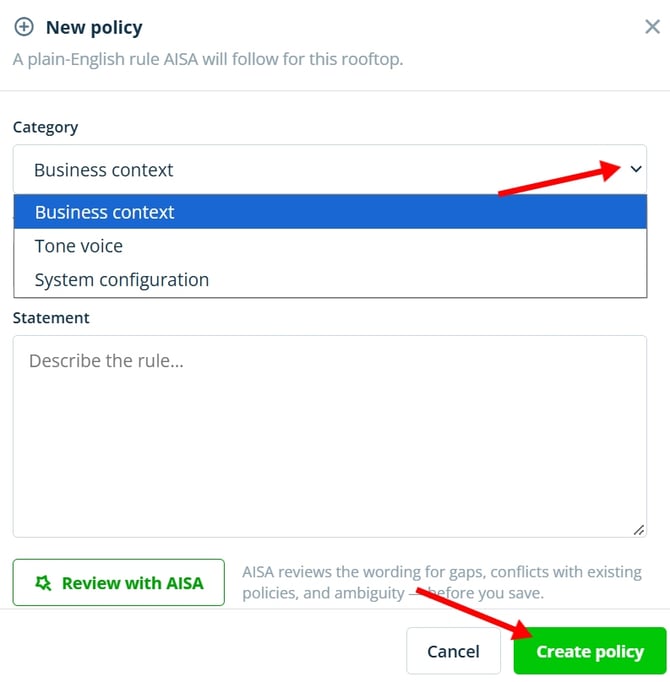
Note: When a policy becomes irrelevant, mark it Inactive. Archived policies remain accessible in case you need them again.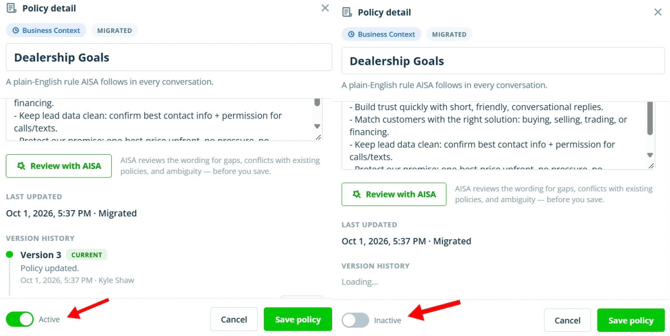
Managing Source Behavior
Step 1:
In Source Behavior, let the AI Sales Assistant answer leads or give human reps a time window to respond first. Set time delays, and if reps don’t reply, the assistant tries to set the appointment.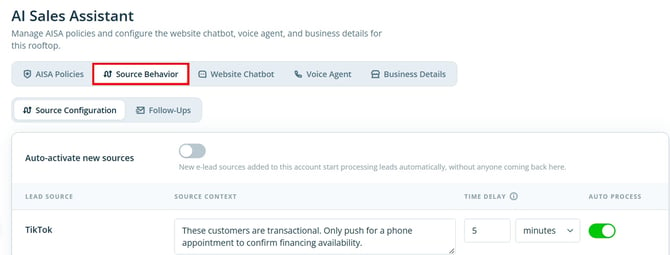
To stop the AI from handling leads from a specific source, toggle the source off. Enable Active New Sources to make sure every new lead source is covered automatically.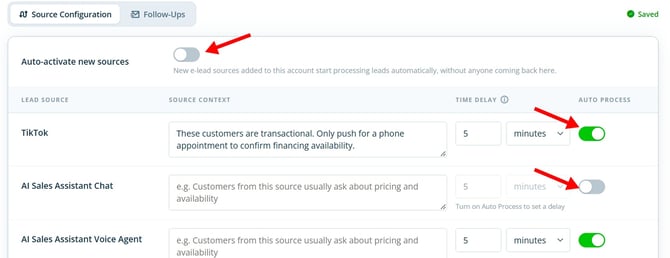
Use this area to set up and adjust follow-up rules for different sources or lead temperatures, including response windows and engagement cooldowns.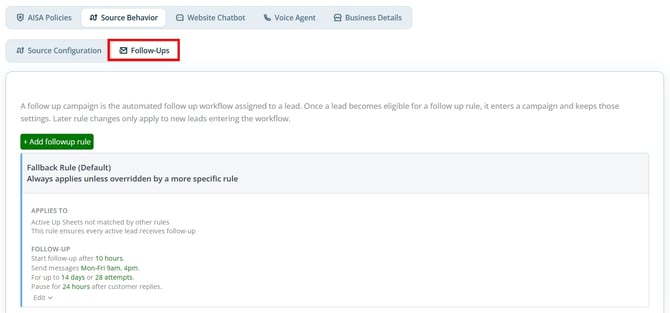
Set Up Website Chatbot
Step 1:
The settings provide the script for your website provider to install the website chatbot. Adjust placement, colors, logos, greetings, and the layout of the chatbot widget.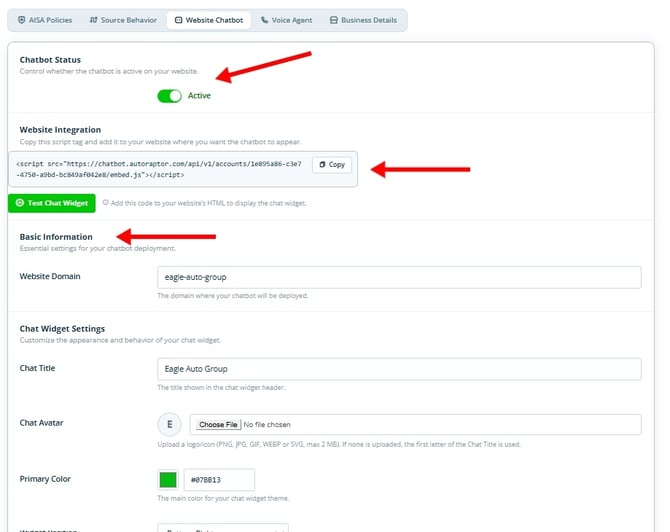
Note: Make sure to add your privacy policy URL to activate the chatbot widgets.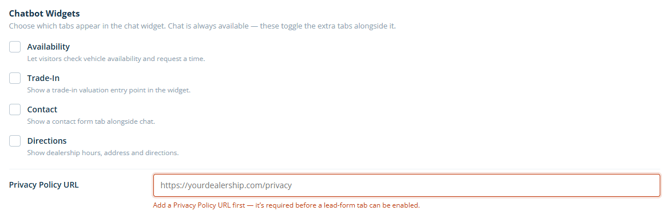
Configure Voice Agent and Business Details
Step 1:
Voice agent configuration is managed with your Customer Success Manager. After setup, update greeting preferences as needed.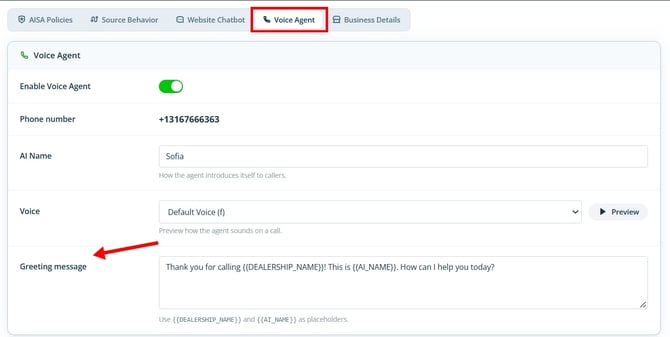
Step 2:
Enter and update business details here. Set a Fallback User for after-hours AI handling, and toggle this feature as needed.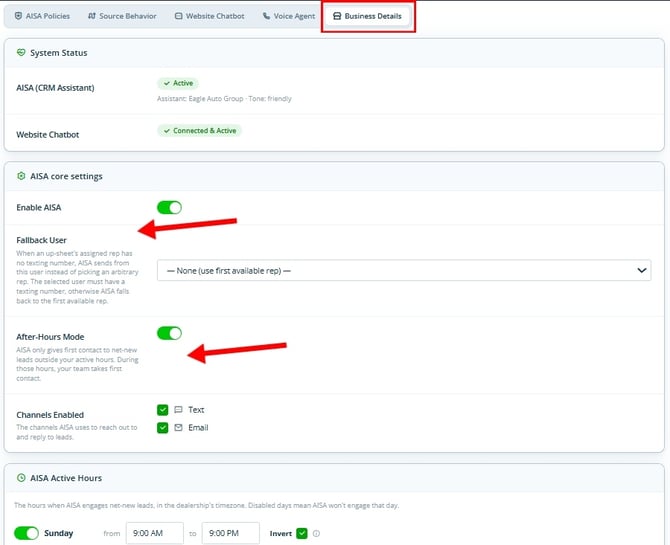
To have the AI send out specific URLs, add them to the designated area for automatic AI messaging.
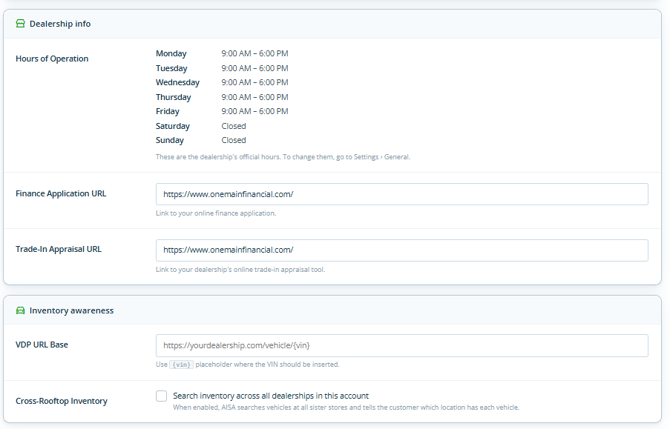
Your AI Sales Assistant setup is now complete, letting you tailor the assistant for seamless sales support and optimized customer engagement.|
Click the link below for a video walkthrough:
https://48309173.hs-sites.com/share/video/223182339696