
You'll find these settings under E-Leads and Assignment and Auto Reply in your admin configuration.
Prefer to watch instead? See our video walkthrough below:
https://hub.autoraptor.com/share/hubspotvideo/221573307140
Lead Assignment Settings
Step 1:
Access Lead Assignment Settings
Go to E-Leads and Assignment in your admin panel to find all current lead distribution options.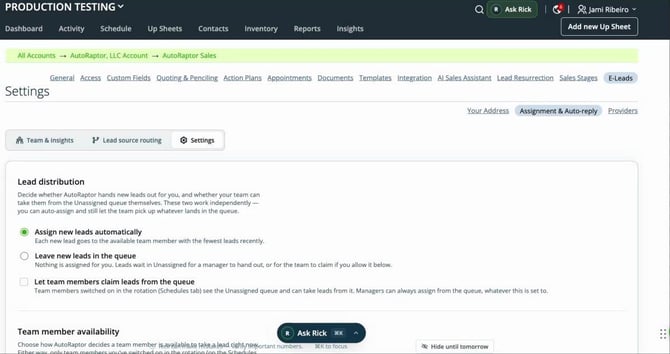
Step 2:
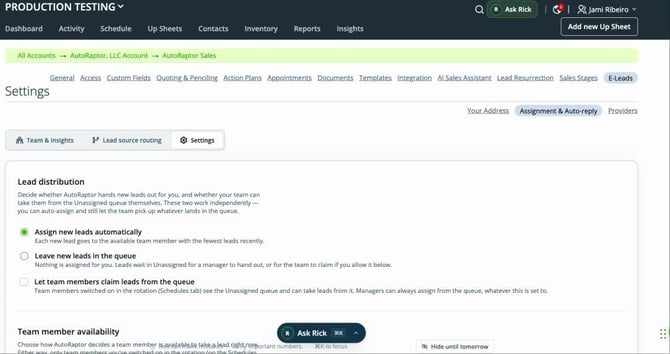
Understand Assignment Modes- Assign new leads automatically — Clock-in status: Users must clock in daily and specify their work hours.
- Assign new leads automatically — Schedule: Admins set each rep's schedule, including days off for vacations or sick days.
Step 3:
Set Up Schedules and Time OffChoose Assign new leads automatically with schedule to let admins define who's working and when. Mark any days off directly in the schedule settings.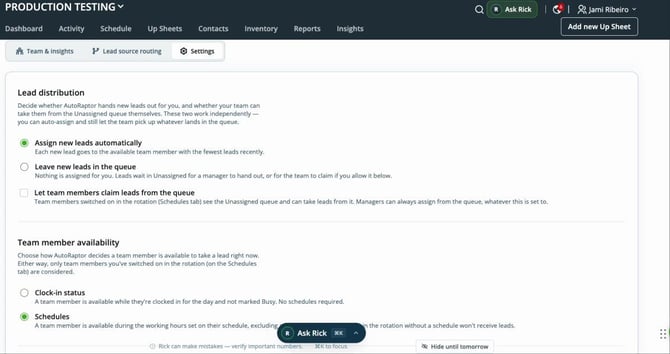
Step 4:
Add a Fallback PersonAssign a fallback team member to automatically receive leads when the primary rep is unavailable — helpful for after-hours coverage.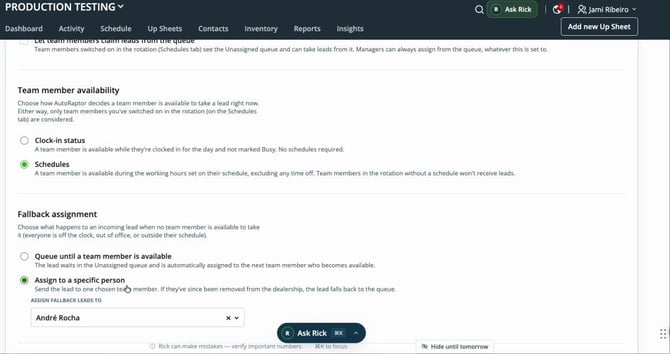
Step 5:
Use Queued AssignmentsSelect Queue until a team member is available to hold leads in the unassigned queue until the next available team member clocks in or is scheduled.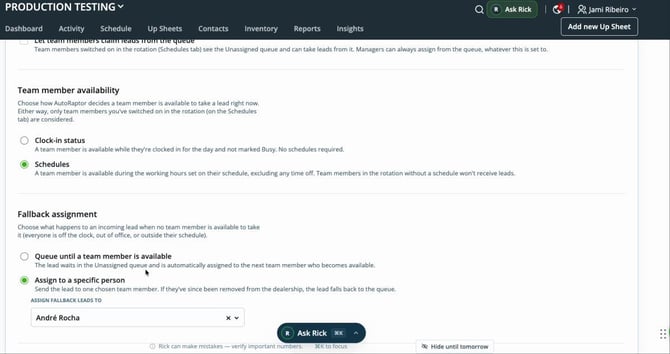
Step 6:
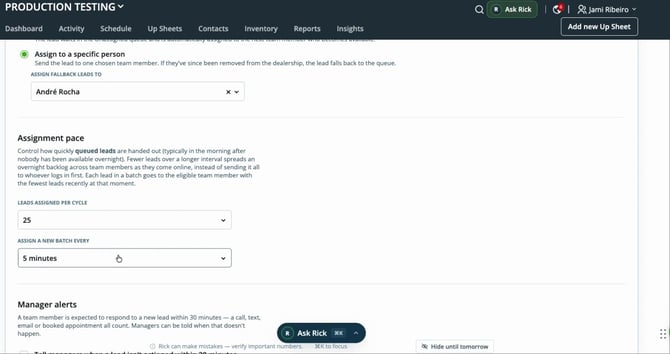
Control Assignment Pace
Adjust lead assignment speed by setting how many leads go out per cycle and the time interval between cycles. This helps manage workload and response time.
Step 7:
Enable Lead Response Alerts
Let managers get notified if a lead hasn't been answered within 30 minutes — this now works with all assignment methods, not just round robin.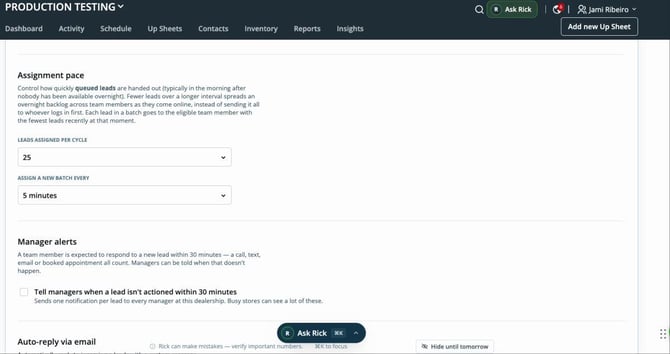
Step 8:
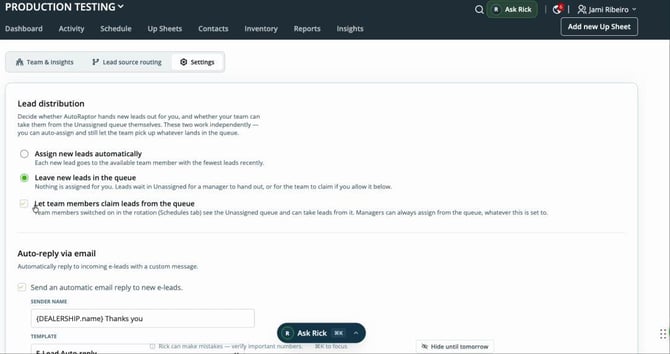
Decide Who Assigns Leads- Leave new lead in the queue: Managers assign leads as they come in.
- Let team members claim: Reps and managers get notified of new leads and can claim or assign them as needed.
Step 9:
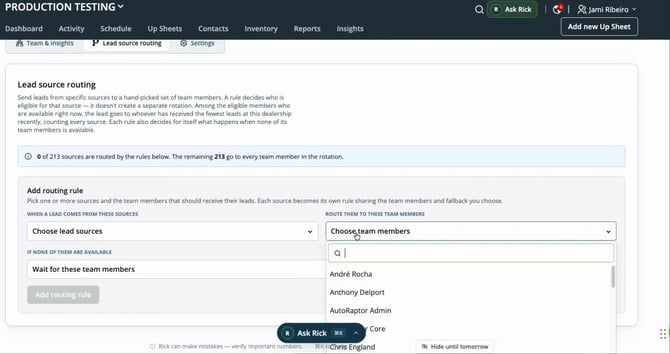
Route Leads by Source
Use Lead Source Routing to assign leads based on their origin. Pick the source, select team members, and specify whether the rule always assigns to those reps, waits for those reps, or includes everyone in the rotation.
- Always assign to these team members: Ignores rep availability — always assigns to the chosen person(s).
- Wait for team members: Only sends to the selected reps; if unavailable, the lead waits.
- Consider everyone in rotation: Anyone in the current schedule can receive these leads.
Step 10:
Add Multiple Routing Rules
Keep adding routing rules for each lead source as needed. Pick the source and set up assignment preferences.
Scheduling Reps and Managing Assignments
Fine-tune who gets leads and when by setting schedules, days off, and assignment styles.
Step 1:
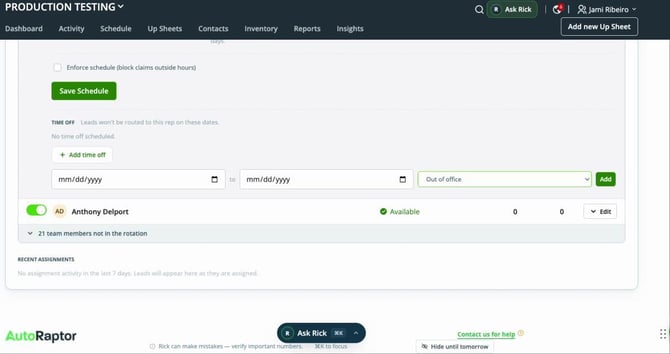
Edit User Schedules
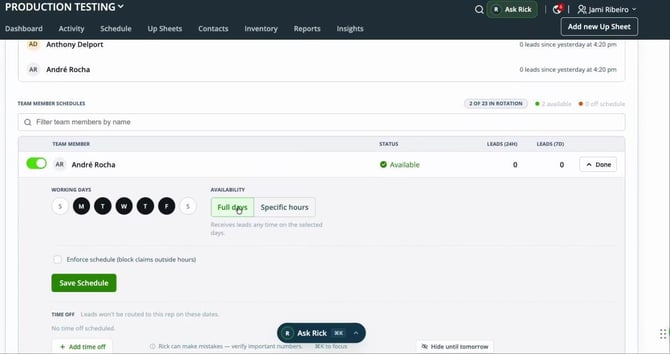
Head to Teams and Insights. Find your user list and click Edit next to a team member to adjust their schedule and eligibility for leads.
Step 2:
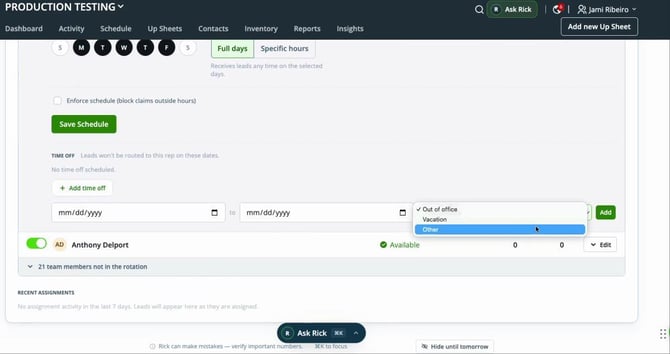
Assign Round Robin 24/7 or Custom Days/Hours
On the user schedule, choose either Full Days or select specific working hours. Mark any time off as Out of Office, Vacation, or Other to remove them from rotation temporarily.
Step 3:
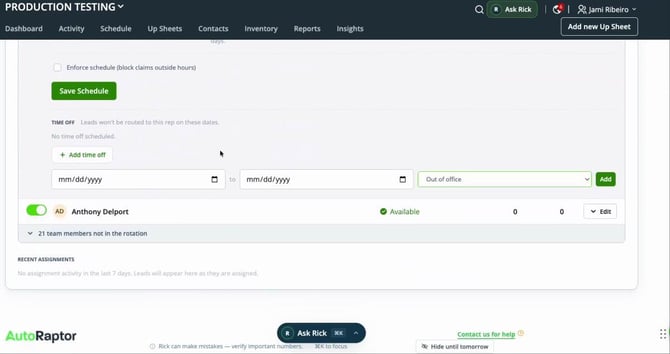
Save Your Changes
After updating schedules or making assignment changes, click Save to ensure settings take effect.
Step 4:
Track Lead Assignment Insights
View recent lead assignments and details on who received what under the Insights section so you can optimize your distribution strategy.
Step 5:
Update Settings as Needed
Return to the back-end settings anytime to update schedules or assignment methods for your team.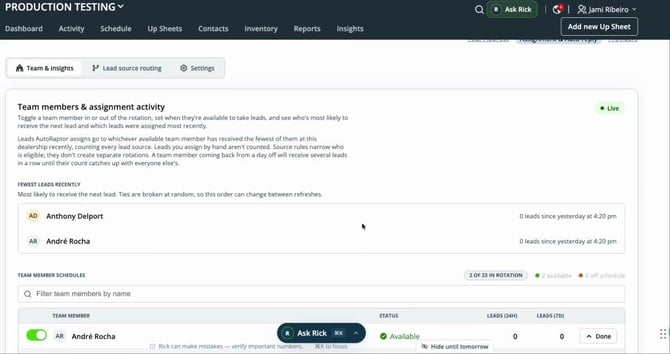
With these new lead assignment features, you get total control over schedules, workload, and routing logic. Adjust, monitor, and fine-tune your workflow so every lead gets the fastest possible response and your team stays productive — even across vacations, days off, or after hours.
How to Check Your Lead Rotation
A quick daily check can help you confirm that automatic leads are being shared fairly across your sales team.
This guide accompanies the Lead Rotation Walkthrough video below and uses the same example day, with all sales reps renamed:
https://48309173.hs-sites.com/share/video/224294295972
How to Check Your Lead Rotation
- Open the Lead Assignment activity report. Look for the Date and Activity For filters in the top-right corner.
- Select a date. Availability tracking began on October 6, 2026. Earlier dates will show a dash (-) in the Considered column.
- Choose your view. Set Activity For to Dealership to review the whole store or select an individual rep.
- Review the summary tiles. Check Back-to-Back and Longest Run to see whether any reps received consecutive automatic leads.
- Check the rep table. Compare Considered, Passed Over, and Auto Assigned to understand how leads were distributed.
- Investigate anything unexpected. Click Manage Lead Assignment at the bottom of the report card to review a rep's settings.
Understanding the Metrics
| Metric | What It Means | What to Look For |
|---|---|---|
| Back-to-Back | Automatic leads assigned consecutively to the same rep. | Ideally, 0. |
| Longest Run | The longest streak of automatic leads assigned to one rep. | Ideally, 1. |
| Considered | Automatic leads the rep was available to receive. | Should reflect their opportunities. |
| Passed Over | Automatic leads assigned while the rep was unavailable, such as when clocked out, Busy, off schedule, or not accepting leads. | Should reflect their time away. |
| Auto Assigned | Automatic leads the rep received. | Review alongside Considered and Passed Over. |
Good to know:
- Queued leads don't count as Passed Over for any rep.
- When no leads are queued, Considered + Passed Over should equal the dealership's total automatic leads for each rep.
- Manual assignments don't count toward these rotation metrics.
What Does a Fair Rotation Look Like?
- Back-to-Back = 0: No consecutive automatic leads went to the same rep.
- Longest Run = 1 or less: No rep received multiple automatic leads in a row.
- Considered and Auto Assigned make sense together: If a rep had many opportunities but received few leads, review their availability and settings.
If a rep received zero leads, check Passed Over. If it matches the day's total automatic leads, the rep was unavailable for every assignment.
If Longest Run is higher than 1, check whether other reps were available at the time before investigating further.
Example:
The dealership assigned 30 automatic leads. Back-to-Back was 0 and Longest Run was 1, indicating that no rep received consecutive automatic leads.
| Group | Reps | Considered | Passed Over | Auto Assigned (Each) |
|---|---|---|---|---|
| Available all day | Ethan Brooks, Landon Price, Mason Whitaker | 30 | 0 | 9 |
| Available during a 7-lead window | Caleb Turner, Owen Mitchell, Ryan Holloway | 7 | 23 | 1 |
| Not in the rotation | Cole Bennett, Jake Sullivan, Nate Harper | 0 | 30 | 0 |
What this tells us:
- All 30 automatic leads were accounted for: nine each for the three full-day reps and one each for the three part-day reps.
- The part-day reps each received one lead during their available window.
- The final group was unavailable throughout the day. Jake Sullivan's one lead was assigned manually and did not count toward automatic rotation metrics.
Frequently Asked Questions
Why does Considered show a dash?
Availability tracking began on October 6, 2026, so earlier dates have no recorded availability data.
Does zero Auto Assigned mean the rotation skipped a rep?
Not necessarily. Check Passed Over to see whether the rep was unavailable for all automatic assignments.
Is a high Passed Over count bad?
Not by itself. It generally reflects time spent unavailable for leads.
What if Longest Run is 2 or higher?
Check who else was available when those leads were assigned. If other reps were available, review the assignment settings.
Regularly checking these metrics helps you understand lead distribution, identify potential issues, and confirm that your team has a fair opportunity to receive automatic leads.